Form integration and document processing...we call it eDocs. Learning Systems and Web Development Services have the systems to help you meet your online form needs. To ensure your success with your online form, we will walk you through a series of questions and put together the right form solution for your form use case. The three main options for online forms are Qualtrics, Adobe Sign, and Form Assembly. Below you will find resources to help you learn how to use these systems in your online document processing endeavors.
What is Adobe Sign?
Adobe Sign provides an easy, fast, and secure way for filling out, sending, signing, tracking, and storing forms and documents.
Who would use eDocs at UVU?
If you are UVU Faculty or administrative staff, and you manage contracts, acquire and process forms, or route paperwork for multiple signatures on or off campus, then Adobe Sign might be the right tool for you!
There are two use cases currently employed at UVU for eDocs.
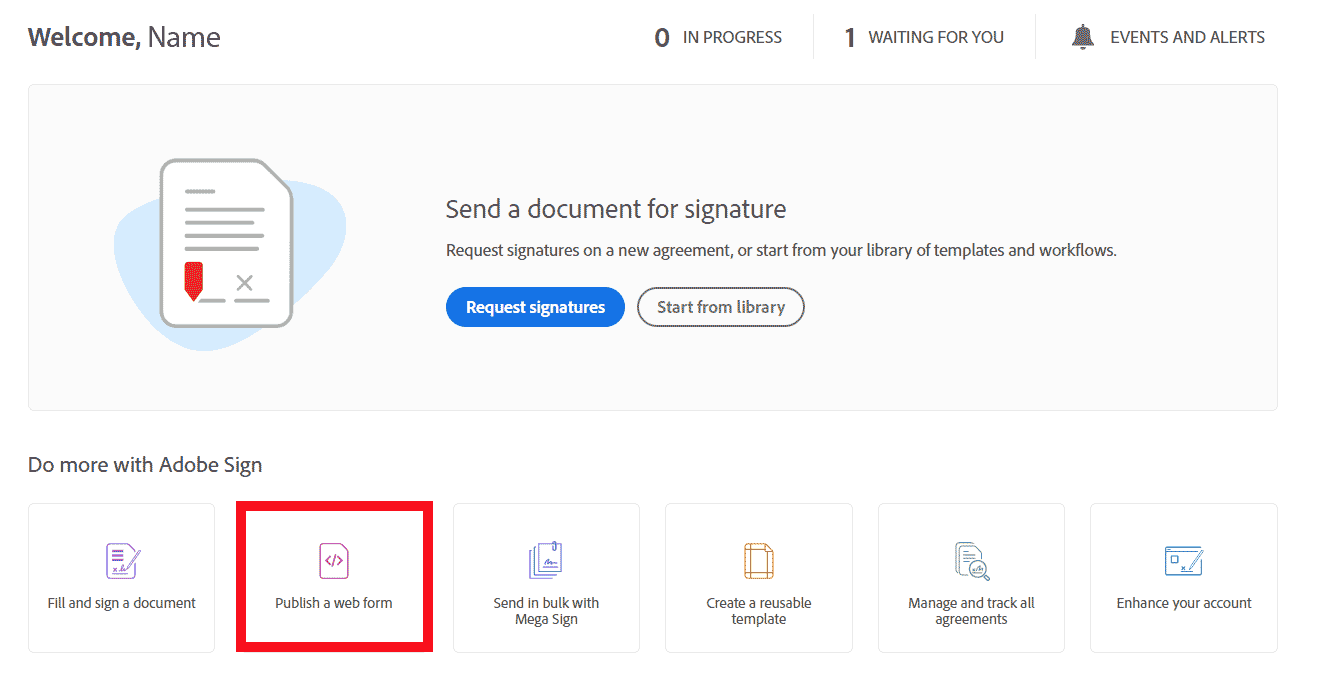
Web form. Most paper forms can be collected through a web front. We can use a web page to collect information that is passed to the form. The form can be routed to one or more individuals to see and sign the form. The completed form can then be sent to staff members inside UVU for processing.
Direct send. Allows the user to upload a document and send it to one or more individuals to sign.
What can you do in Adobe Sign?
If you have any trouble opening the link, or providing your e-signature via Adobe Sign, please contact the Service Desk for support.
I am a UVU Faculty/Administrator, and would like to send a form to require e-signature from multiple people via Adobe Sign - how do I get started?
All employees can log in to Adobe Sign with their uvu.edu emails. Follow our 'how to' guide below.
If you have any trouble logging into your Adobe Sign account, or if you need additional support in sending or managing your documents via Adobe Sign, please contact the Service Desk for support or submit a support ticket on uvu.edu/web.
If you're interested in learning more about Adobe Sign PowerForms, contact your web
area support or email [email protected].
If you would like help on a specific topic please look at our walkthrough articles below:
If you cannot see the picture examples, you can download the Adobe Sign Documentation file.
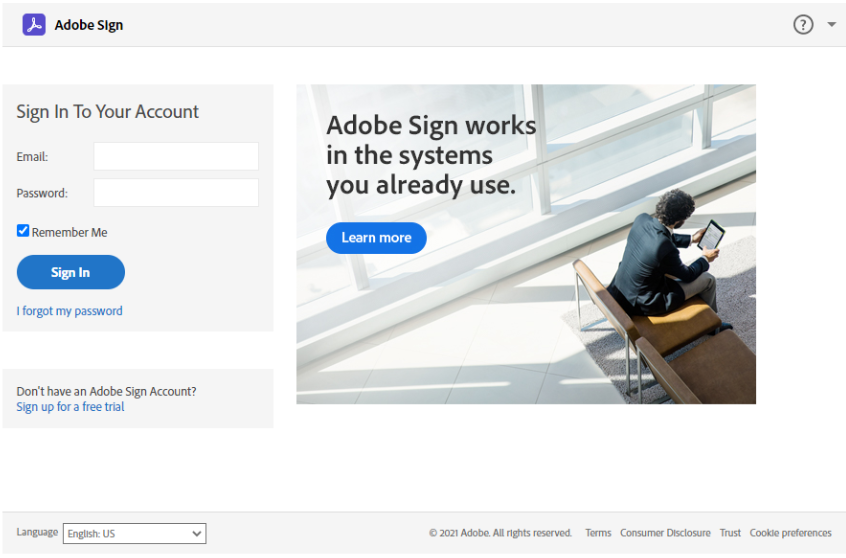
Visit the Adobe Sign login page. Be sure to use your UVU email. It will then redirect you to another page. Click company login and sign in through the myUVU login page.

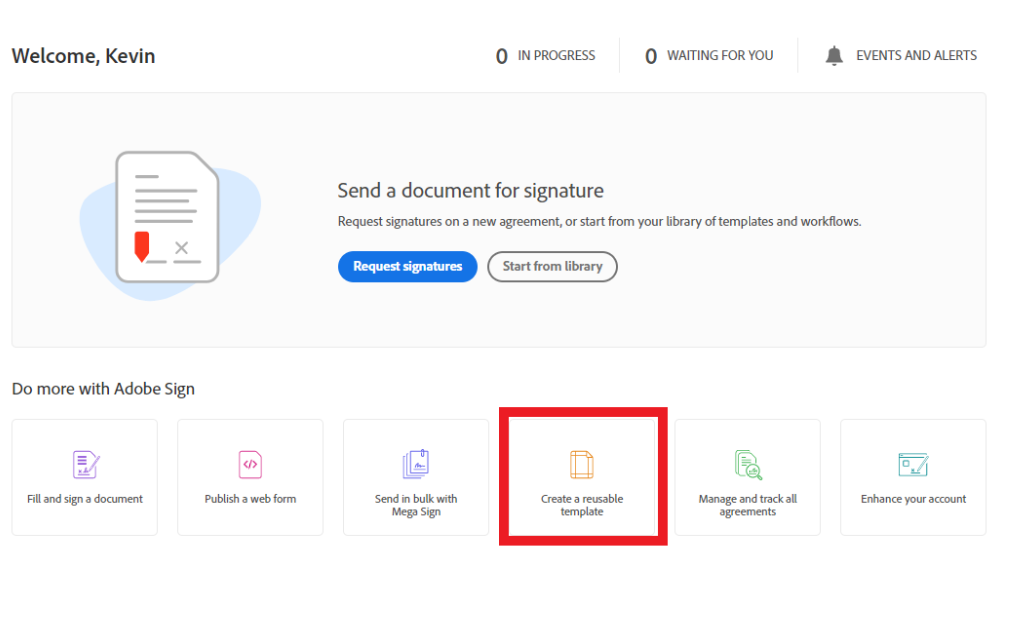
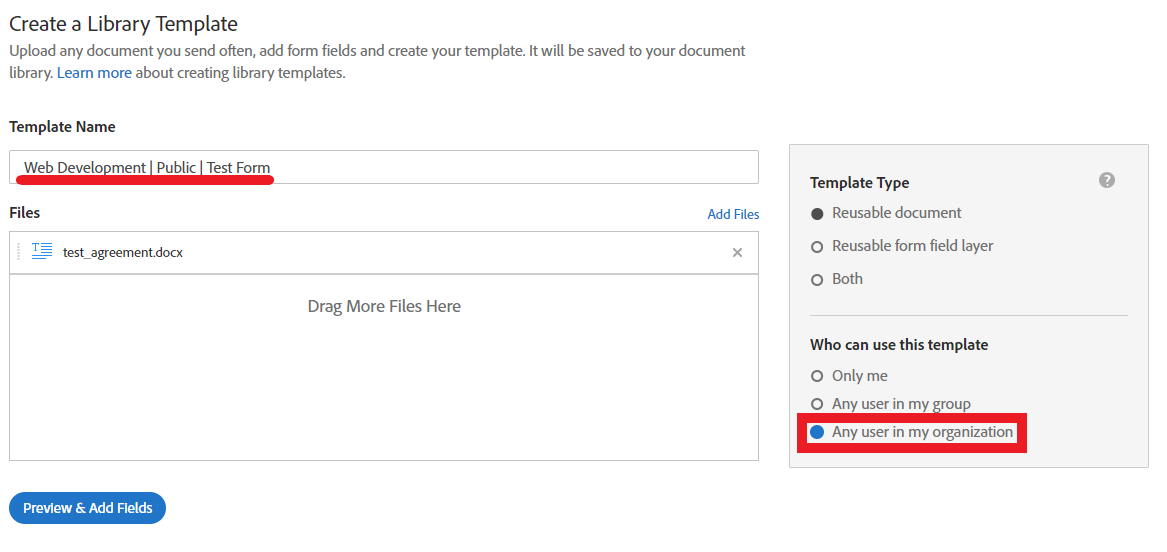
Select “Create a reusable template” to create a template. Then fill in the required information.
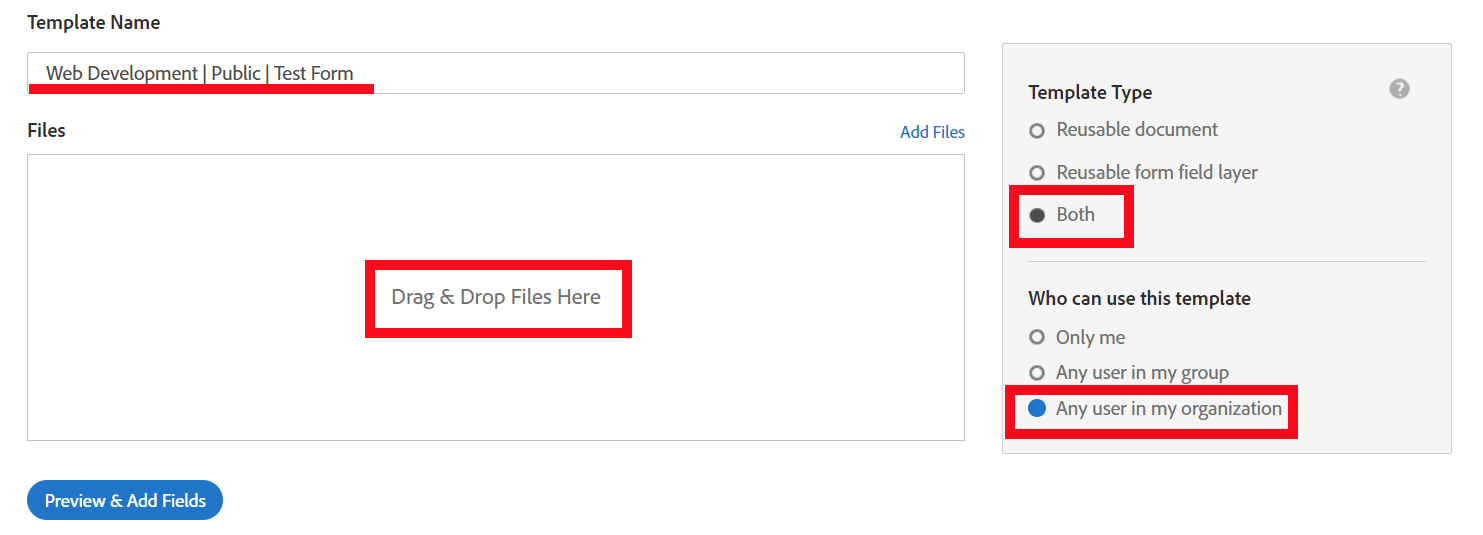
You must use proper naming conventions – Department Name | Public | Name of Form.
You must select “Any user in my organization”.
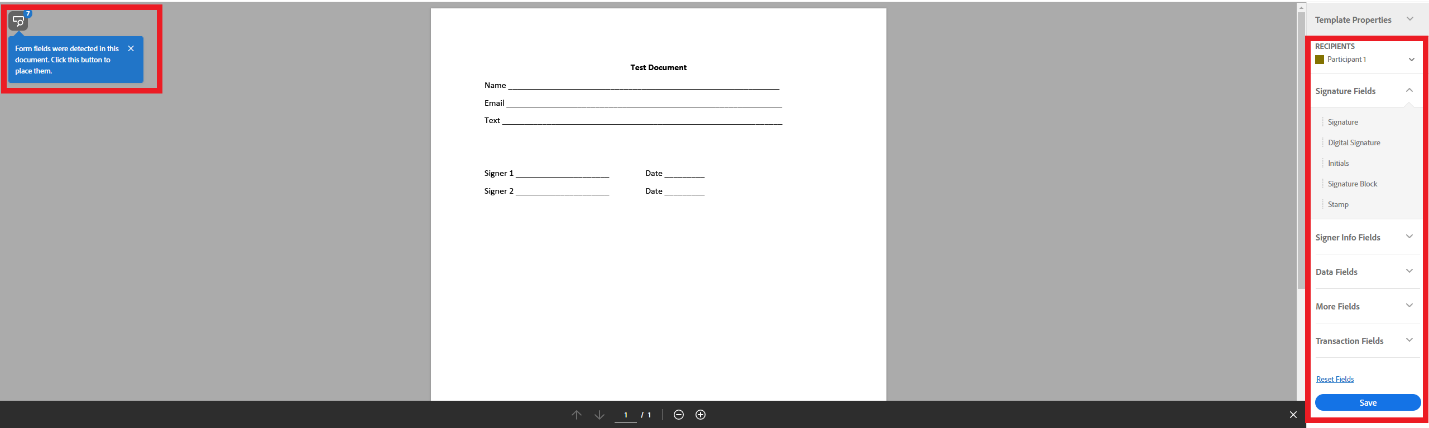
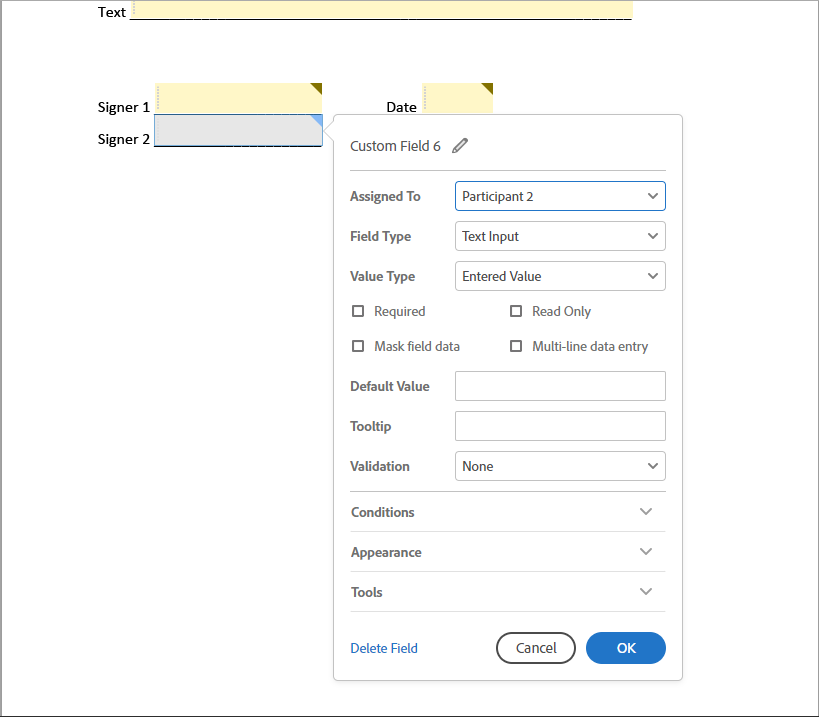
Adobe sign can autofill the fields you need by clicking the button in the top left side of the screen. If you need to add or change fields. You can click and drag field options from the sidebar on the right-hand side of the screen. You can also customize each individual field by double clicking the field you want to change.
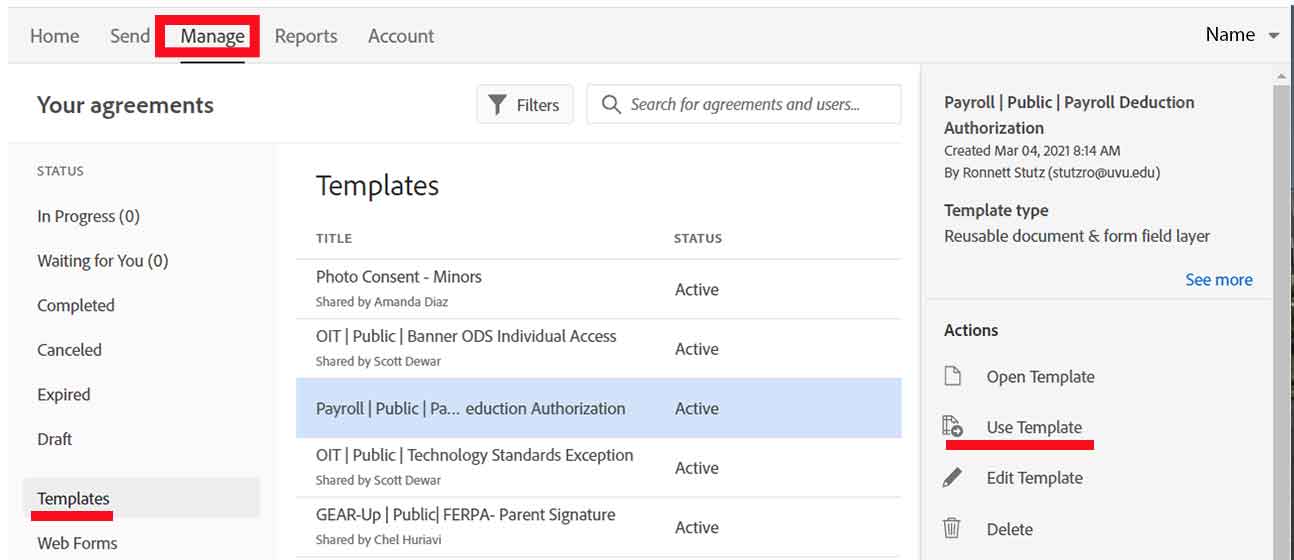
You can send a template form by clicking the manage button in the top left-hand side of the page. Then select templates and find your form. You may need to use the filter and search bar shown in the top right-hand side of the page.
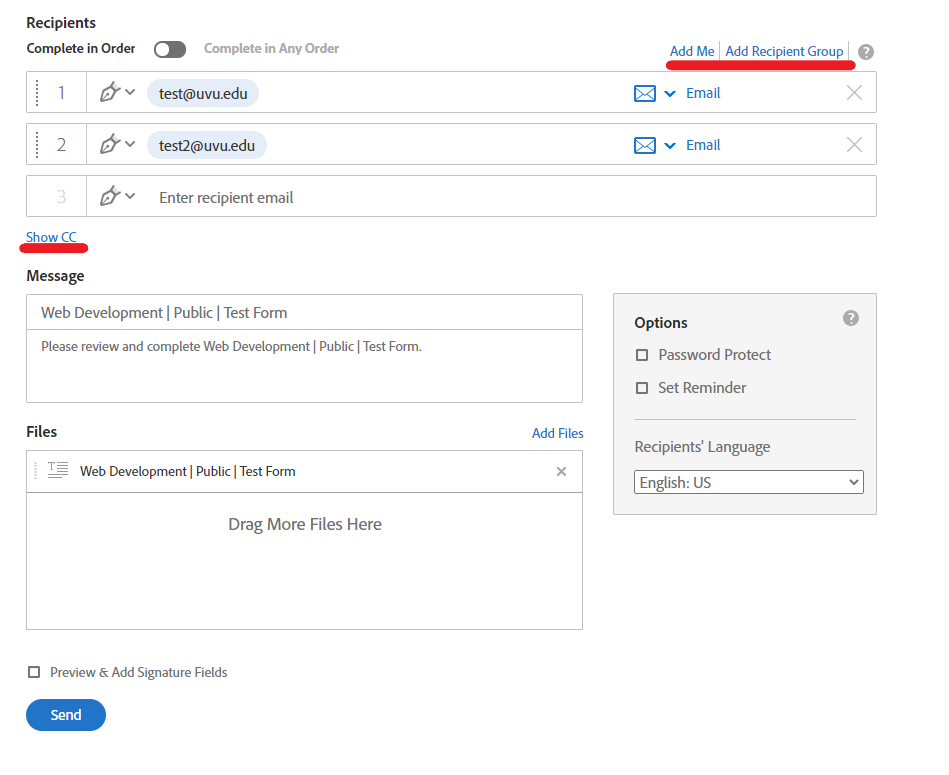
Once you have found your form click on it. A side bar will appear with several options. Select the “Use Template” option and you will be forwarded to a page where you are required to add the information of everyone who will be signing or receiving a copy of the form.
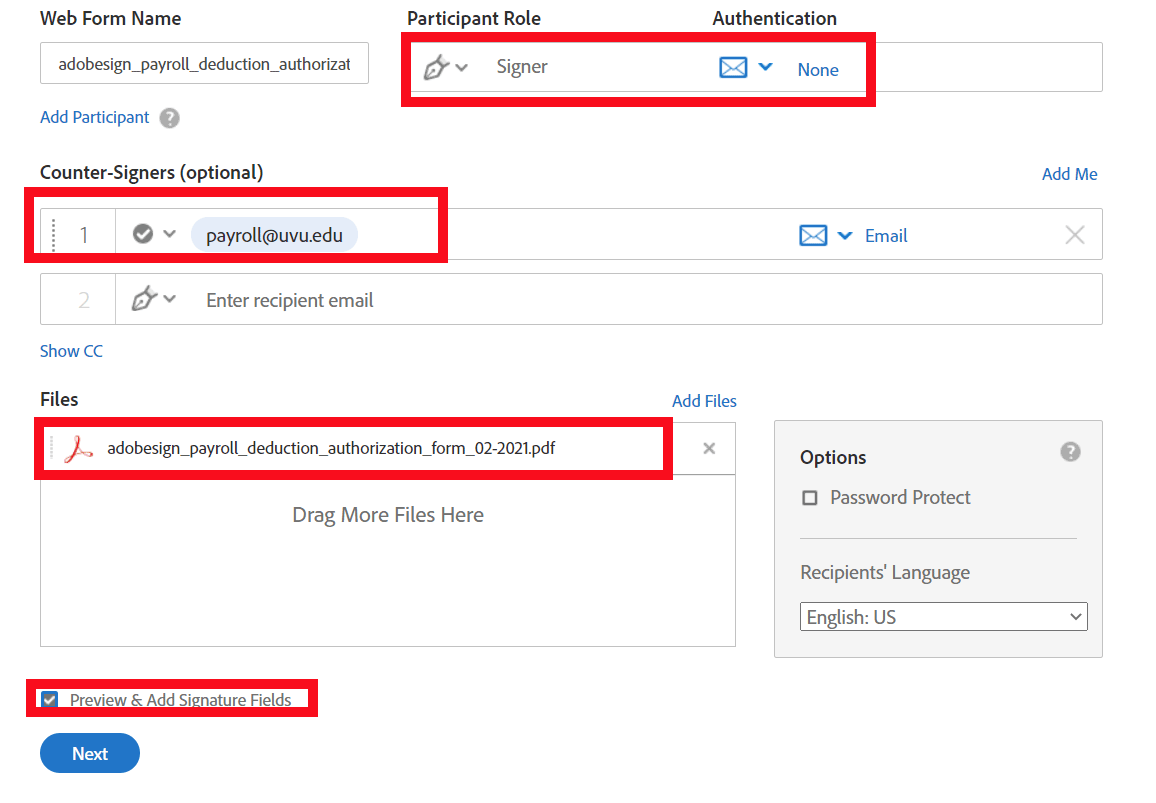
Creating a web form is the exact same as creating a template. The only difference is that you are required to specify how many participants there will be. You will not be able to change this. Make sure the number of signers needed is solid before creating a web form.
Set the routing of the form.
Upload the file for the form.
Check the box for "Preview & signature Fields."
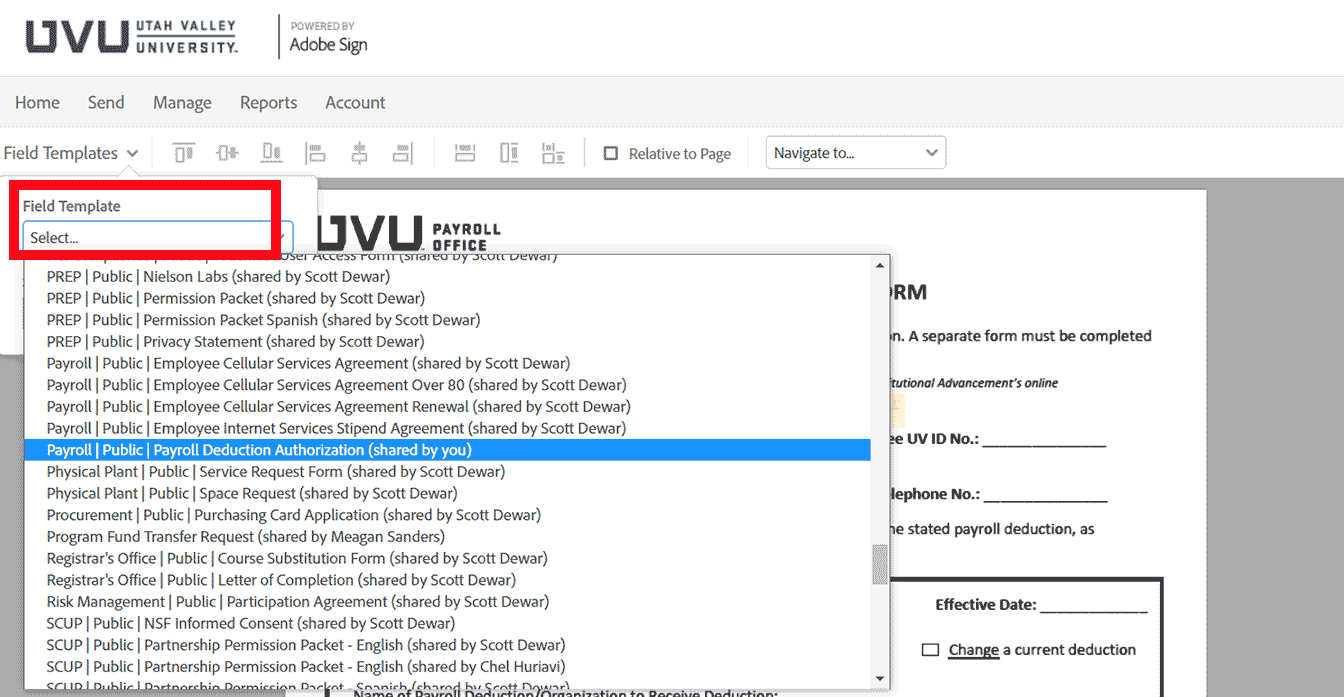
Find the template through the "Field Template" dropdown.
This will pull in all the fields you established on the template. You can alter the fields if needed.
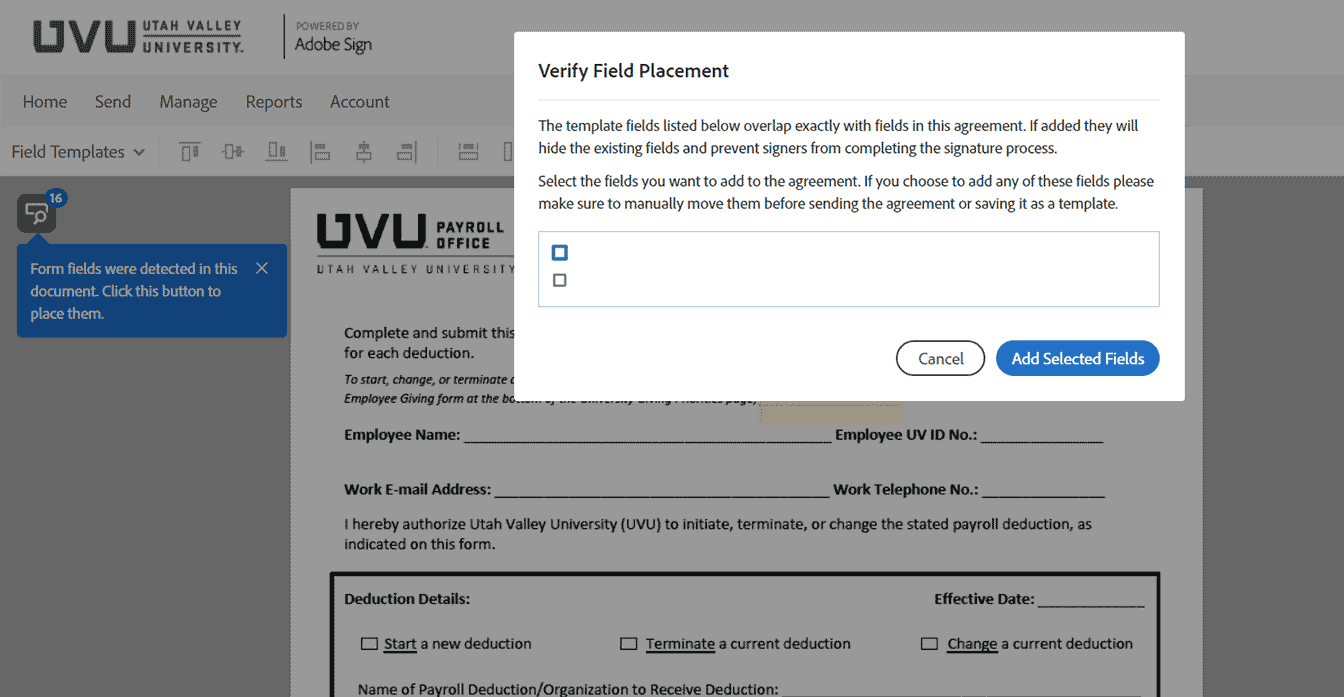
Verify that you want the field placement from the template to be the same for the HTML form.
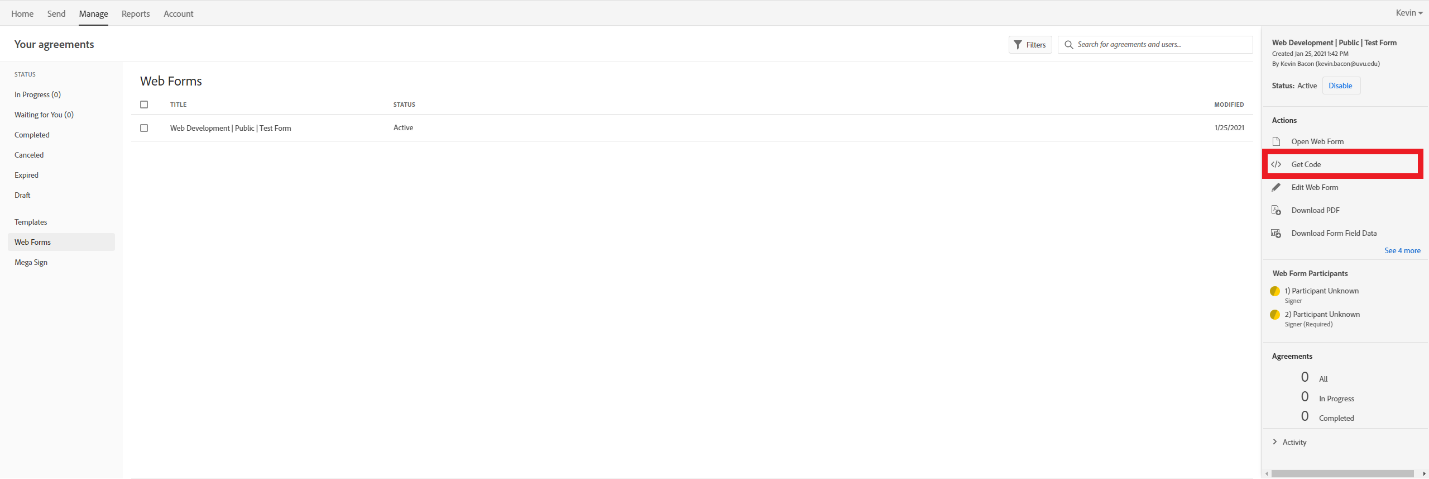
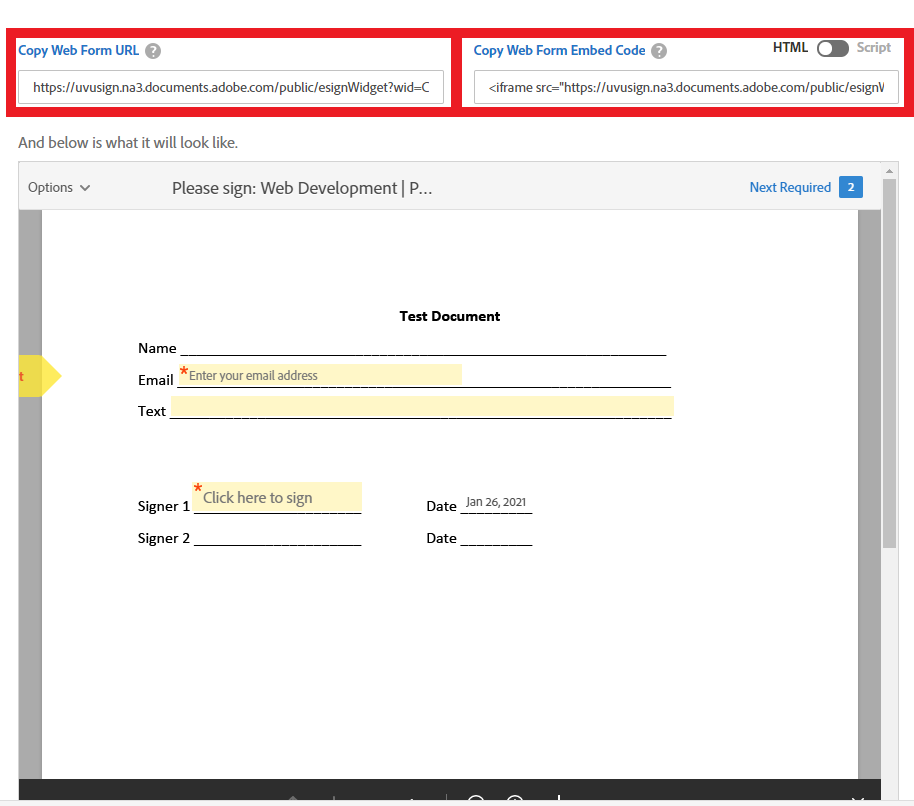
You can find your web form the same way you found the template. After clicking on your form, select “Get Code”. You will then be redirected to a page where you can either copy a link to the web form or embedded code.
We are currently gathering the instructions and how to's for this system and will publish here as we get them. Please check back for updates.
We are currently gathering the instructions and how to's for this system and will publish here as we get them. Please check back for updates.

