902 Making images accessible
"Alt" tags
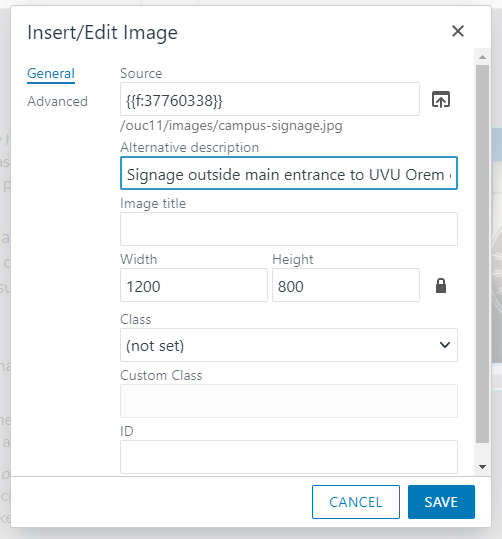
Adding an alt tag to an image is a quick and simple process in Modern Campus CMS. An alt tag provides an image description, or alternate information about the image and is helpful in making our websites accessible.
Step 1
Navigate to the page with the image you would like to update in Modern Campus CMS and open it in the editor. Click on the image to select it. When it is selected, it will have a white border with squares around the edges.
Step 2
Once the image is selected, click on the "Insert/Edit Image" icon.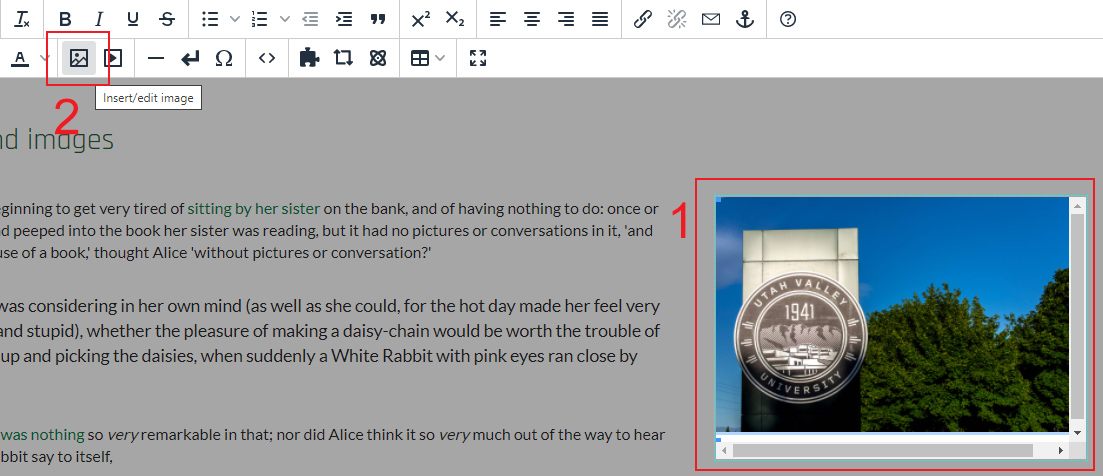
Step 3
Enter a brief, helpful description of the image in the "Alternative Description" field.
Step 4
Click "Save" to apply the changes. Be sure to save and publish your page.